Thursday, August 30, 2012

What Should I Do With It Wednesay? Week 2

Here's it is, a day late and a dollar short. (Well, maybe only a day late.) This week, the item isn't large and I know I can do the usual paint it to look cute and use it for it's original purpose, but I'm looking for something clever and totally outside of the box.


It looks like a book or photo album....


But wait a minute......


It's a nifty tray with a handle. This item could just stay a tray and be really cute painted....but I'm looking for some wild and crazy ideas...maybe I could try and convert it to an ipad cover or something (FYI: already tried, and my ipad won't fit) :(  Sky's the limit people, please help me with some ideas!

Don't settle for dull, live a refinished life!

Wednesday, August 29, 2012

What did I do with it?

Last week, I started a new series called "What Should I Do with it Wednesday?" (See original post here). I didn't get any comments with suggestions, but I'm not deterred. I took the gravel sifter, thingy and combined it with parts of this:


to make this:


Didn't that turn out great? I didn't take pictures of the process, but here's what I did. First, I sprayed the whole gravel thingy (yeah, that's what I'm calling it!) with clear matte spray to preserve the rusty wire and the wood. Then, I cut out a square in the wire mesh at the top to fit the lighting fixture through. After that, I unscrewed the pendent fixture parts, took off the ugly lampshade and fed the socket through the hole I cut in the mesh. Then I just had to screw the whole thing back together. I added this funky Edison style bulb I had cause I think it makes it look cool.

Here's some more pictures for your enjoyment:


I can't believe how easy that was! I'm starting to wonder what other stuff I can turn into funky chandeliers. Stay tuned for another installment of What Should I Do With It Wednesday later today!

Don't settle for dull, live a refinished life!

*Shared at:


House on the Way
Fridays Unfolded

Tuesday, August 28, 2012

New: Grab a Button!

I just got my blog updated with it's new look (for now). I'm sure I'll be editing it eventually as I can't leave my furniture placement alone very long, let alone a blog look. But in the meantime, feel free to grab a button below or over on the right hand sidebar. Please add a button to your blog or follow me on Twitter, Pinterest, by email, or with Google Connect. Thank for checking me out!

BLOG TITLE

Thursday, August 23, 2012

Rake Wine Glass Holder

I've been seeing this everywhere on Pinterest and in the blogosphere. Taking this:


and making it into this:


Here's a few tips for making your own. First, figure out how you're going to hang it. My rake head was pretty bent, so if I wanted to put the nail in the middle of the handle on top, I had to bend it. Remember that this will get pretty heavy with glasses on it, so either make sure you hit a stud, or put an anchor in the wall. I actually ended up putting three nails in, two in studs on either end and one in the middle. Before you put glasses on it, it's best to seal it in some way. You could either spray paint it a fun color, or leave it rusty (like I did) and just spray it with a matte clear spray paint.

Now you have a fun, fairly inexpensive way to display your wine glasses. You can make a bar anywhere in your house, just by hanging one of these on the wall above a buffet, countertop or table.


I had the perfect spot for it in my kitchen. I had this music cabinet in this weird corner already and it seemed like the perfect spot for a wine bar.

Don't settle for dull, live a refinished life!

Sharing at:
Visit thecsiproject.com

Fabulously Creative Friday: Jennifer Rizzo

To Paint or not to Paint?

Sometimes I have a hard time deciding what do to with a project. I found this table at a garage sale:

Originally, I was going to repaint the base heirloom white and do a blue and white chevron pattern on the top. (I know, chevron on a circle, I must be crazy.) But then I started looking closer at the top and noticed this:

Now I'm thinking I can't cover up that gorgeous inlay. I thought about just painting the tray and leaving the sides as is, but that might be too busy. Not to mention the wood on the top is really nice. What do you think? Do I paint the top or refinish the wood with a nice stain?

Don't settle for dull, live a refinished life!

Wednesday, August 22, 2012

What Should I Do With It Wednesday?

I am starting a new weekly series called "What Should I Do With It Wednesday?" This series will feature something I have been hording storing for awhile while I figure out what to do with it. I'll let you as readers comment on the post with your ideas. I will then try to make a project out of that item and show off the results at the beginning of the next week's post.

For the first week, I have this item:


I think it's a rock sifter or gravel sorter or something of that nature. I picked it up at a garage sale for pretty cheap (don't ask me exactly how much, as I can't remember.). I have a few ideas roaming around my head for this one, but I want to see what everyone else comes up with it. So, join in the fun and comment on what you think I should make out of this bad boy!

Don't settle for dull, live a refinished life!


*Side note: you can either leave a comment here, or follow me on Pinterest and comment on my pin. Thanks!*

**UPDATE: See what I did with it here**

Tuesday, August 21, 2012

Map Boxes

Many projects lately have revolved around my office. Recently, I needed storage for my conference room. I found some unfinished wood boxes at Joanne Fabrics. I also had a whole stack of National Geographic maps my Grandma had given me. I decided to stain the boxes and modge podge some map sections on the sides. Here's the results:


They make a nice addition to the bookshelf.

Don't settle for dull, live a refinished life!

Monday, August 20, 2012

Leather and Burlap Toy Box Ottomen

I had redone an auction toy box find previously here, but it wasn't doing it for me anymore. Here's a quick recap of the original box:


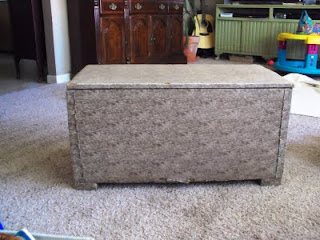
Ugly contact paper. Ripped off to reveal this:


*Shudder* Recovered with batting and slipcovers to make this:


Not bad, but even though it was a slipcover, it was a pain to get off, it stained instantly and I didn't wash it frequently enough. Then, I scored this vintage leather coat at a thrift store:


It's a nice burgundy color trench and soft as butter. I would've worn it as is, but sadly the size small didn't fit well. I decided to cover the top of my box with the leather (easy to wipe off clean) and the bottom with some burlap potato sacks I've been saving. I didn't really take any in progress pics, but it mostly involved the staple gun (and occasionally when the staples didn't go in all the way, the hammer). Here's the result:


I forgot to mention, I measured the outside of the box and then sewed sacks together for the right width before stapling on.


The result of which, means that wherever the cut mark for the side of the bag was where the seam went. I kind of like the hodge podge look though. It gives it a very depression era, make do with what you have look, don't you think?

Don't settle for dull, live a refinished life!

*Shared at:

Visit thecsiproject.com

Friday, August 17, 2012

Burlap Coffee Sack Chair

I got a chair at an auction recently for $2.50. That's right, $2.50! It was in okay condition, the legs in the back were split (nothing some wood glue couldn't fix) and it was covered in an ancient ugly vinyl. On the plus side, someone had already stripped the wood arms and legs (No sanding? Bonus!). Here's what it looked like before:


And here's what it looked like after I was all done:


*Sigh* I am in love. And what's not to love? Distressed gray arms and legs:


Burlap coffee sacks for fabric:


I managed to get the back looking good for once:


And I managed to use some of the original rusty upholstery tacks I pulled out:


Yep, it's most definitely love! Have you done any upholstery projects lately?

Don't settle for dull, live a refinished life!

*Shared at:

Furniture Feature Fridays

Visit thecsiproject.com

Tuesday, August 14, 2012

Gypsy Skirt Turned Dress

Awhile back I saw this tutorial from Martha Stewart on Pinterest. I thought it looked pretty easy and decided to give it a try. It took awhile for me to find a skirt that I thought was long enough from the thrift store. Finally, I scored this one:


It's a cute layered gypsy skirt with lace and tulle. (Ignore the fact that I already cut the waistband off. I get eager to start sometimes before I realize I forgot to take a picture.) So, I followed the video instructions above for cutting and sewing. Here's what it looked like when I was done:


The only problem with it is, it's white. I decided to try ombre dip dying the skirt. (Don't worry, that ric rac is not going to be the actual ties.) I used a Rit dye color called Scarlet. I thought that would give me a nice deep red up to a pink shade. This is what I got instead:


Pink, pink, and more pink! It's not bad, just not what I expected. I obviously didn't put enough dye in the bucket. (So much for the dump method of measuring!). It's hard to tell in the pictures, but it is ombre. The effect is pretty subtle.

Here's an example of what it could look like tied with a belt:


It's very gypsy, cowgirl-esque. It would look great with boots! I will be updating this post with an actual pic of me in the dress later. I didn't have anyone to take one of me earlier. Word to the wise, if you attempt this, try to find a super long skirt. The longer the better. This one is a little shorter than I'd like. I might add some extra lace or ruffles at the bottom for more coverage.

Don't settle for dull, live a refinished life!

Shared over at:
Visit thecsiproject.com

Monday, August 13, 2012

Tobacco Cabinet Redo

I'm not sure why this didn't post yesterday, but here it is a day late. I had this little table with a door in my garage forever.  It was given to me by my father-in-law. Here's what it looked like pre-redo:


I always wondered if this little table had a particular purpose, as the entire inside is lined with copper sheeting. I did a little digging and found out it's actually either a smoking stand, tobacco cabinet or cigar humidor. (I'm not sure which, Internet search returned all three descriptions.) Either way, the final result turned out great! I sanded it, painted it dark grey, distressed it (fancy word for sanding the edges), and stained over it. Here's how it turned out:


I love how the distressing turned out on this piece. Here's a shot of the top:


And for anyone wondering, here's how the inside with the copper looks:


So, what do you think? I think this piece turned out great. I have it in my new office uptown.

Don't settle for dull, live a refinished life!

Saturday, August 11, 2012

Mirror Frame

I recently refinished a mirror frame for a friend. She had found a mirror with a great frame around it. The problem was it didn't match the set of furniture in her daughter's room. I of course forgot to take a picture before I sanded the mirror, but you'll get the idea:


Usually when I spray paint I don't worry too much about sanding. This frame had a pretty heavy varnish on it, so I did give it a quick go-over with a stripping sponge. I spray painted the base coat of ivory, then touched on some gold accents:


(Ignore my feet in that one!) :)


Finally, to age the frame a bit to match the bedroom set, I went over the whole thing with a light stain on a rag. (Wipe on, wipe off!) This is a good way to get an antique glaze-like effect on your piece for cheap (stain is way less expensive than those fancy glaze finishes and does pretty much the same thing.) If the piece is something that gets a lot of use (like a chair) then you probably want to seal it as well. A mirror that hangs on the wall doesn't require any sealing. Here's the whole finished mirror:


The mirror turned out pretty great. It matches the bedroom set perfectly (Whew! *wipes nervous sweat from brow*). I probably wouldn't have chosen the gold accents on my own, but I have to say, they look pretty nice on the frame.

Don't settle for dull, live a refinished life!