Tuesday, July 25, 2017
Shelving Update
I've been changing small things around the house lately. I decided to change up these floating shelves I had in the living room.
They were okay, but I put those shelves here when we first bought the house 7 years ago. I decided it was time for a change. I also wanted something that fit better with the barn wall. I had several wooden drawers in the garage I knew were made for some kind of project. I decided this was it.
The bottom of these drawers were pretty shot, so I just removed them. I sealed the shelves with a matte clear spray paint. After hanging and styling, here's the final results:
I think these fit in with my barn wall much better than the old ones. Plus I have a lot more display space than the old shelves did. Stay tuned for more updates like this around the house soon!
Don't settle for dull, live a (re)finished life!
Saturday, July 15, 2017
Little Tykes Picnic Table Redo
Maddy's Little Tykes picnic table was looking a little worse for wear lately. It was pretty sun faded.
Plus, I don't know who decided on color combos when they made these originally, but I'm not a fan.
I've seen multiple makeovers of these and other Little Tykes products over the years on Pinterest, so I decided to try my hand at it. I did clean it off with soap and water, but I did not sand this at all. I whipped out my trusy RustOleum spray paint and got to work.
I decided to do the top using my lace method. I think it turned out great! Now Maddy can sit with her snacks on the deck in style!
Plus, I don't know who decided on color combos when they made these originally, but I'm not a fan.
I've seen multiple makeovers of these and other Little Tykes products over the years on Pinterest, so I decided to try my hand at it. I did clean it off with soap and water, but I did not sand this at all. I whipped out my trusy RustOleum spray paint and got to work.
I decided to do the top using my lace method. I think it turned out great! Now Maddy can sit with her snacks on the deck in style!
Monday, June 26, 2017
Chalkboard Fridge
We've been talking about painting this 1970's golden harvest beauty for awhile now. That's right, I'm talking about the garage fridge!
Hubby already started painting when I was like, "Wait! I didn't get a before picture!!" To which hubby rolled his eyes, told me I was weird and kept painting. :)
We used Rust-Oleum spray paint like this. (not an affiliate link, I get nothing for this.)
It worked out great! I used painters tape over the door seal but other than that sprayed away! Here's the results:
It will be super fun for M to be able to use her sidewalk chalk on this. She has a habit of thinking it's fun to draw on doors anyway. :)
Hubby already started painting when I was like, "Wait! I didn't get a before picture!!" To which hubby rolled his eyes, told me I was weird and kept painting. :)
We used Rust-Oleum spray paint like this. (not an affiliate link, I get nothing for this.)
It worked out great! I used painters tape over the door seal but other than that sprayed away! Here's the results:
It will be super fun for M to be able to use her sidewalk chalk on this. She has a habit of thinking it's fun to draw on doors anyway. :)
Wednesday, June 21, 2017
Rustic Bridal Shower
My brother in law is getting married at the end August and we recently had a bridal shower for my fabulous future sister in law at the same place where they are getting married. They are having the wedding at this fabulous farm a few miles from my parents house. Mom and I had a lot of fun decorating the barn.
Here's the entrance:
We used lots of burlap and lace for decorations. The wedding will be using some of the same decorations as well.
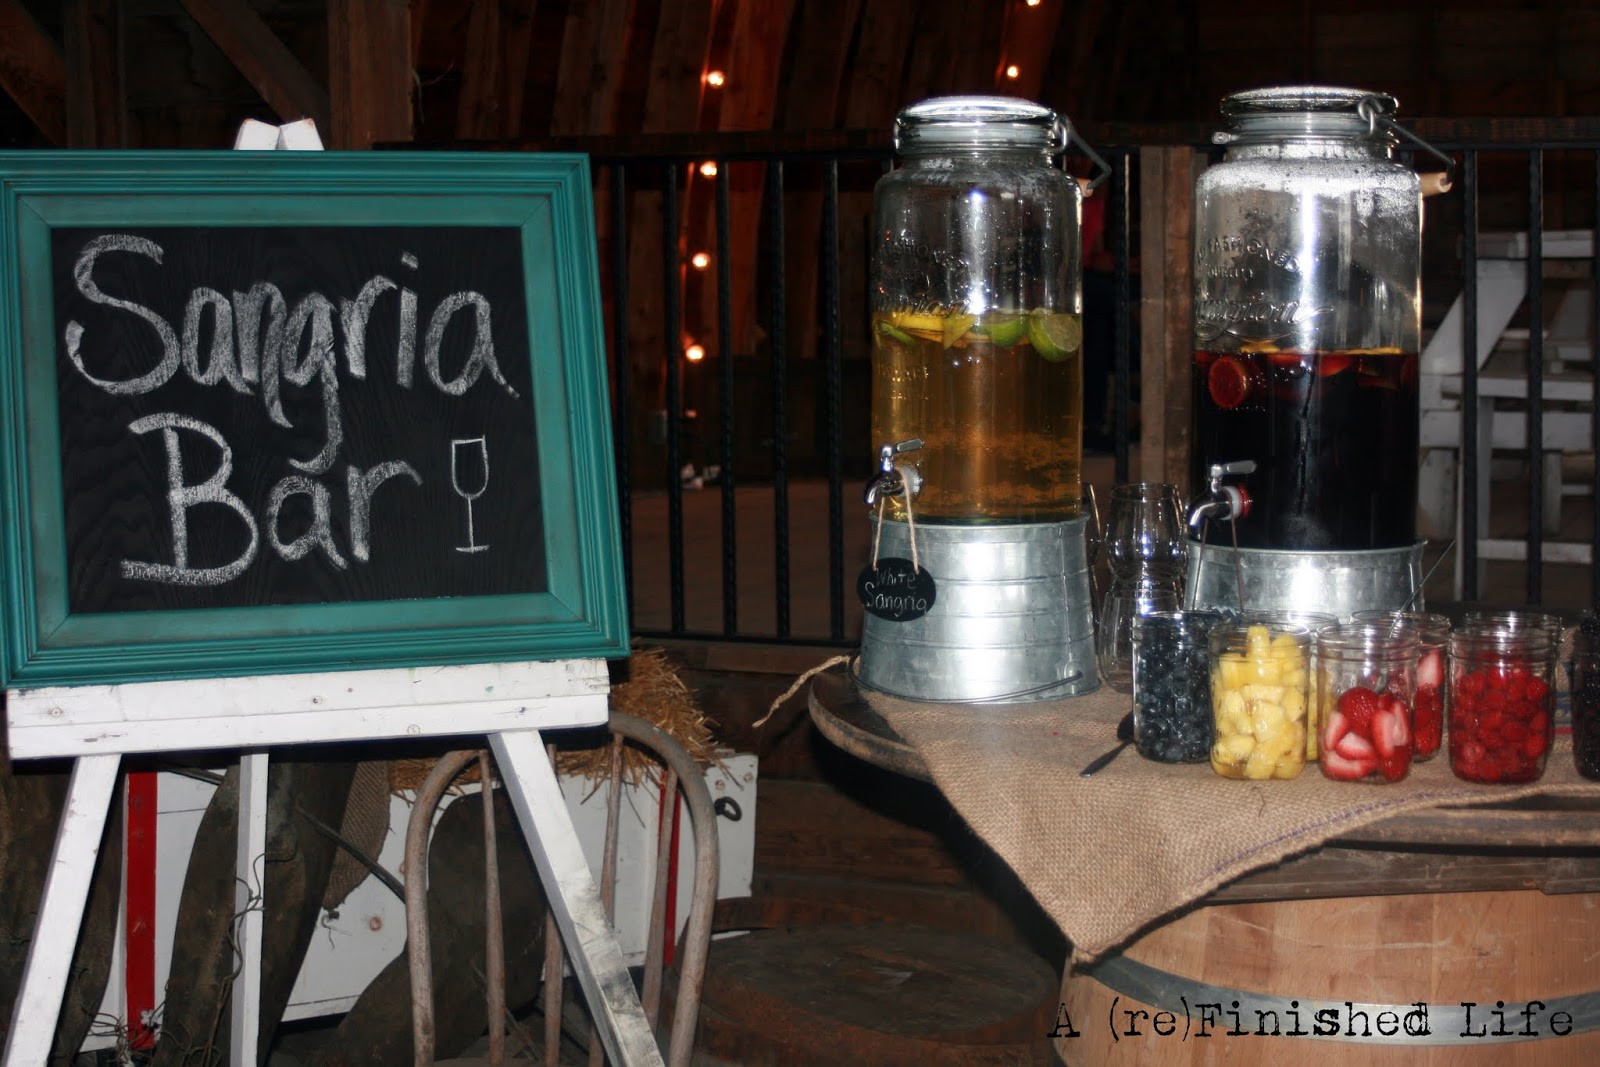
We had a sangria bar set up.
Yum!
I made an easy fun little banner by putting gold stickers on a premade set.
I made some delicious cupcakes from recipes I found here and here. They were super delicious!
Here's some more pictures of the barn and the various decorations:
Labels:
barn,
bridal shower,
burlap,
decorating,
lace,
reuse,
wedding
Monday, June 5, 2017
Barn Wood Accent Wall
Let me just start this post by saying I have the best
parents ever. They recently stayed with us so they could go to grandparents’
day at school for Maddy. After they attended that, they put up this barn wood
accent wall all while hubby and I were gone. I came home to this:
I’m so happy with how well this turned out. I must be the
luckiest girl in the world.
Sunday, February 26, 2017
Antique Turned Wine Cabinet
I have had this antique sheet music cabinet for a long time.
I've used it for various kinds of storage over the years, but I've always wanted to revamp it somehow. I finally settled on the great idea of turning it into a wine bar/storage area. The first thing I did was pull off the back which was warped and rotten. Then I pulled out a few of the shelves to make room for some wine glass holders. I had to put a new back on. I chose to paint some bead board with a pop of color. Here's the result:
It works out great. I especially like how well it fits in this little space in the kitchen. I also like how nice it looks with this pallet wine rack my brother and sister in law gave us for Christmas.
What do you think? I think I love it. I also think I need a glass of wine to celebrate.
Don't settle for dull, live a refinished life!
I've used it for various kinds of storage over the years, but I've always wanted to revamp it somehow. I finally settled on the great idea of turning it into a wine bar/storage area. The first thing I did was pull off the back which was warped and rotten. Then I pulled out a few of the shelves to make room for some wine glass holders. I had to put a new back on. I chose to paint some bead board with a pop of color. Here's the result:
It works out great. I especially like how well it fits in this little space in the kitchen. I also like how nice it looks with this pallet wine rack my brother and sister in law gave us for Christmas.
What do you think? I think I love it. I also think I need a glass of wine to celebrate.
Don't settle for dull, live a refinished life!
Thursday, February 16, 2017
Guest Room Update
Last fall we switched our daughter's room and the guest room around. It took me forever to get things to what I consider pretty well finished in the room and even longer to get the whole thing actually cleaned all at one time. :) Despite that, the results are great and I'm so excited to finally be able to show them off.
The bed is pushed up next to the wall just inside the door. I did this because we don't have guests super often and I wanted to make plenty of space for the office portion of the room. The dark gray stripe on the wall was yellow when our daughter used this room. I opted to paint it a dark glossy gray to keep the wall color fairly neutral.
I used a small folding plant stand for a side table as there isn't much room between the bed and the doorway.
I love me a good artwork wall for a focal point. I had all the pieces on this wall already.
This shelf was in the room when it was Maddy's. I decided to leave it because it works so well in the space. (For those wondering, yes, I did take it down to repaint the stripe even though I was very tempted to be lazy!)
Here's the desk and work space. I'm pretty pleased with how this desk looks in the space. This was the desk in my office uptown previously. It fits really nicely in here.
I found the chair at a local thrift store. It's just the right size for the space, and it swivels. It must have been repainted by someone at some point, but they did a nice job. It's very light gray in color.
One of my biggest feats was probably reorganizing the closet! My Hubby cut an extra piece of closet shelf we had lying around and it helped immensely with the storage issues.
Another piece of furniture formerly from my office. It displays things pretty nicely along with the bookcases made from crates I snagged long ago at a garage sale.
That's pretty much the 360 degree tour of our guest room/office. I just hope I can keep it clean enough to actually work in here on a regular basis. Now, I'm off to drink some tea and edit future posts. Hope you enjoyed the tour!
Don't settle for dull, live a refinished life!
Wednesday, February 15, 2017
Storage Crates
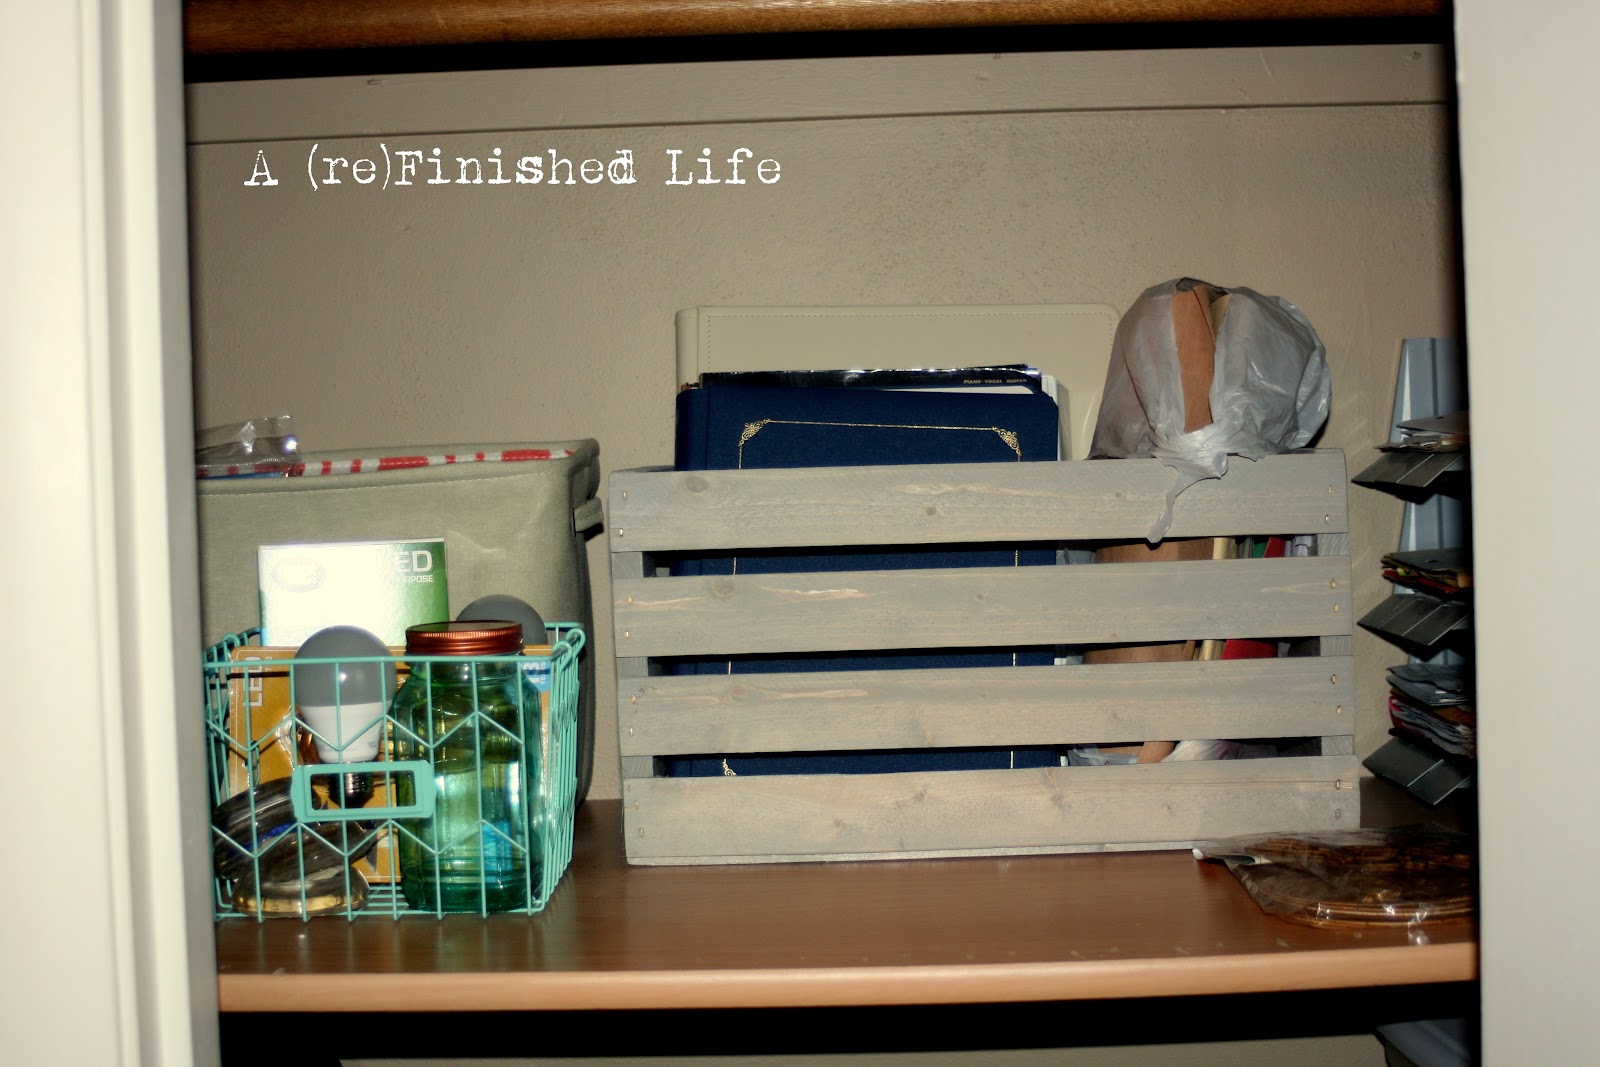
As a part of the guest room update, I needed some storage in the closet. I found some unfinished wood crates on sale at Menards and decided they would be perfect.
To finish them, I used a gray stain to make them look weathered.
Here's how one of them looks in its new home:
I think it's a great solution for the guest room closet. The stain gives just a hint of color while still showing the wood grain. I think I need to use this stain more often! I will be revealing the entire guest room tomorrow.
Don't settle for dull, live a refinished life!
To finish them, I used a gray stain to make them look weathered.
Here's how one of them looks in its new home:
I think it's a great solution for the guest room closet. The stain gives just a hint of color while still showing the wood grain. I think I need to use this stain more often! I will be revealing the entire guest room tomorrow.
Don't settle for dull, live a refinished life!
Saturday, October 15, 2016
Ceiling Fan Update
My husband recently put a ceiling fan in the guest room. It's a used fan, but it's a Hunter and really good quality. The only problem with it is that it looked rather dated. It has the 90's brass color and the shades were not really attractive. Here's what it looked like:
I apologize for the quality of these pictures. It was extremely difficult to get anything with the way the lighting works in this room.
I didn't mind the brass so much, as the room as some industrial notes. So, I opted to try changing out the shades and see what happens.
Such a difference with almost no work. I added a $2 bulb cage from the hardware store and an Edison bulb and look at the change!
I love the look! It just goes to show you not every change has to be drastic in order to make a difference. I finally finished this guest room, so I will be doing a reveal of the whole space as soon as I figure out how to work my new camera flash. Hopefully, it will help these pictures turn out better.
Don't settle for dull, live a refinished life!
I apologize for the quality of these pictures. It was extremely difficult to get anything with the way the lighting works in this room.
I didn't mind the brass so much, as the room as some industrial notes. So, I opted to try changing out the shades and see what happens.
I love the look! It just goes to show you not every change has to be drastic in order to make a difference. I finally finished this guest room, so I will be doing a reveal of the whole space as soon as I figure out how to work my new camera flash. Hopefully, it will help these pictures turn out better.
Don't settle for dull, live a refinished life!
Labels:
fan,
home decor,
industrial,
lighting,
recycle,
reuse,
thrift
Wednesday, May 4, 2016
Pinspiration: Key and Sunglasses Drop Space
Hey y’all! I’m back!! I started a new full time job in
December, and things have been crazy! I now have a daily commute, so time for
projects has been limited. But, I do have a few new things to share and I’m
hoping to post them all in a semi-timely manner!
I decided to start things off in this renewal of posting by
starting with another Pinspiration for you. I saw this pin (a project by Gina over at Shabby Creek Cottage).
I thought it was a great idea since my hubby is forever looking for his keys. The instructions are pretty straight forward. I used a board from the Menards odds and ends bin ($1.79!) I bought the pipe straps and coat hooks there as well. I opted for 1 inch straps instead of the ½ inch Gina suggested, mostly because I like big sunglasses and I have many pairs. I liked the copper straps, but none of the coat hooks Menards had matched. Instead, I bought the cheapest nickel plated ones and spray painted them with metallic copper paint I had on hand. I think they match pretty well.
I ended up painting my board off white and then dry brushing it with gold chalk paint. I think it turned out pretty good. It's got just a hint of a metallic sheen. Here’s the final project all loaded up:
And here it is in the entryway next to another former Pinspiration project:
What do you think? I think it was a fast, easy and satisfying project. Don’t settle for dull, live a refinished life!
p.s. Sorry the pictures are a little dark and off-colored, I tried multiple ways to get these to turn out, but I've never been able to get decent pictures in my entryway!
Labels:
organize,
Pinspiration,
Pinterest,
spray paint,
storage,
wood
Subscribe to:
Posts (Atom)